Jan 112016
 
Zyx, Windows 10 and PL2303 Driver

When using Windows 10 the driver for the PL2303 inside the USB connection cable for the Zyx, the Zyx software cannot find the COM port. Windows itself might see it. Or it cannot start the device. In all cases the Zyx software cannot find your Zyx.

The tricky part is that with the default Windows driver it finds the PL2303 driver, but it cannot start it. Installing the PL2303 driver from Tarot itself does not help since it’s an older version of the driver.  Windows thus defaults to the newer one. Thus you not only have to install the Tarot USB PL2303 driver, but also select it explicitely in the device manager.

 Posted by at 17:24  Tagged with: ,
Jan 252015
 

Here a list of what I would recommend someone who looks into RC, mainly for multi-rotors as those are quite en vogue currently. Lots of links

General FAQ

  • 2km, indoor models 100m, with proper antennas more than 100km
  • 50 km/h
  • US$100 to start minimal (good toy grade), US$500 for something more generic and re-usable (hobby grade). There’s no limit for professional equipment.

Some Definitions

  • Multirotor is anything which is not an airplane and has more than 1 rotor/propeller. Typical is quadcopter (AKA quad) as it’s the most simple one, thus most popular.
  • Multirotors have clock-wise (CW) and counter-clock-wise (CCW) spinning motors and the propellers need to match. While motors can spin any direction, the propellers have a top and bottom, so you need both CW and CCW propellers.
  • Helicopter have usually 1 large rotor and 1 smaller rotor to control yaw.
  • Fixed pitch (FP) helicopters regulate up/down via spinning the main rotor faster/slower. Don’t fly those outside with wind. Multirotors are usually fixed pitch type.
  • Collective pitch (CP) helicopters regulate up/down via changing the attack angle of the main rotor blades. The rotors spin at a constant rpm. Very agile. Challenging to fly. But you can do things like flying upside-down. Not recommended for beginners.
  • LOS is Line of Sight: You watch the thing you fly.
  • FPV is First Person View: You see what the camera on the thing you fly sees. Interesting point of view at times and it’s easier to learn orientations, but unless you know what you do, you need someone watching (via LOS). In some countries this is mandatory, so technically you cannot fly FPV alone.

Beginner Stuff

If you don’t know if you want this as a permanent (or at least longer term) hobby, get a feel for it first. I started with a US$30 RC helicopter.

  • Start with a small quadcopter (Ready To Fly AKA RTF): They are cheap, fly well, are not easy to break, and if, they are cheap to repair. I recommend to buy 2 (but not 2 transmitters).
    • Hubsan X4 (various versions): Flies well, can have brushless  (H109) or FPV (H107D). US$50-200. Flies well, hard to break, and you can get replacement parts.
    • Walkera Ladybird with and without FPV. US$60-200. Stable, works. I have the older non-FPV model. I like it. You can get a “proper” RC transmitter which you can re-use for larger models too.
  • For reference: this is what I started with. Not a quadcopter though. The first quadcopter I built broke within the first week.
  • Do not buy anything in toy shops or department stores. Those RC models are bad and expensive. Often both.
  • Read a lot. Forums are great and offer a lot of good information and helpful people in case you actually have a problem which is not yet solved. Good forums are RCGroups, and for FPV FPVLabs.

So you can fly and want more…

Once you know that this is not a fad-of-the-week, get something larger for outside. The above models you can keep for flying at home or when there is no wind outside.

Here some general rules:

  • Small is cheap. Too small is expensive again though. Stick to 200mm-300mm motor-to-motor distance.
  • Small is fast. Those small ones are nimble.
  • Large and heavy is stable in the air, and will break a lot more when it hits anything. And it’s more expensive to build and repair. I do not recommend large quadcopters for beginners. Once you can fly the small stuff, then go as big as you like.
  • Soldering is a really useful skill: if cables/connectors break, you can fix a lot by soldering. Without you have to buy replacements parts more often. Small electronic soldering iron is all you need. US$50.
  • Get a good set of screw drivers and hex drivers. M2/M2.5/M3 is most needed. Hex drivers are 1.5/2/2.5mm.
  • Get a usable battery charger. 50W output power is sufficient for a while. Usually they can use no longer needed 12V notebook power supplies. But check voltage and ampere. Make sure to get a charger which has balance ports and can charge 1S-6S (minimum 1S-4S). I have this one and it works well. I also have that one and it’s way better, but also way more expensive, especially as the power supply is a noisy 600W PSU.
  • Heat shrink tube. Use it. Nothing is worse than a short circuit with a LiPo battery. PlastiDip is ok too. Don’t forget that carbon fiber (CF) conducts electricity.
  • Apropos LiPo: Never charge them unattended. Never over-charge them. They will at least puff, and at worst burn. Don’t over-discharge either, but they’ll be “only” pretty dead then. Don’t keep them charged for days. Keep them cool (10°) for storage. Keep them warm (30°) for high performance. If they act funny or there’s doubt they work well, discharge and trash. If you have not figured it out by now: LiPo’s need some love. Have 4 LiPo’s. No need for more, but don’t have less than 2.
  • How much flying space do you have? X4/Ladybird need about 25m2 space. A 250 size quad about 400. FPV will require more space or it’ll get boring fast.
  • Don’t fly where children or dogs are. Both like to catch those funny things which fly in the air.
  • Never fly over people. If anything breaks, all quadcopters pretty much fall down immediately. It hurts when it hits someone on the head.
  • Transmitter: Futaba, JR, FrSky, Walkera, Spectrum. All work fine. Get what friends have. Initial setup is most difficult which is where friends can help. Afterwards it’s more personal preference.
    Obviously you need a matching receiver.
    I have a JR XG11 and I am very happy with it, but I’d get a Taranis if I had to get one now.
  • It is recommended and in some countries mandatory to have an insurance.

 Good Examples of Small Quads

Here 2 examples of small quads:

  •  Armattan CF226 or receiver-ready (AKA RXR: add receiver and battery only). The latter is US$265 and you won’t get much cheaper if you buy single parts yourself.
  • Tarot TL250. Needs 4 motors like those,  propellers like these or those, a flight controller (plenty available nowadays: Naze32, CC3D, MultiWii, APM, Naza), 4 motor controllers (ESC) like those. Some cables, heat shrinkand zip ties and other small stuff.
  • Typical LiPo is 3S 1300mAh or 4S 1000mAh.
  • Good camera for those is the Mobius. Small and light and hard to break.

 Something Bigger

If you want to carry a camera like GoPro or Sony, go for something a bit bigger. 6″ propellers help already. Frames for 8″ propeller and larger are plentiful. Some random examples are here, here, here, and here. Some RXR are this and this. Some of them can carry camera like the Sony Nex-5T including a gimbal.

FPV?

Before attempting FPV flying, get the basics down. The video link is an extra  item which can break and if it does, you need to fly LOS. So make sure you can fly LOS first.

Too easy?

If you can fly your multirotor like this, and FPV like that, then get a CP helicopter and learn to fly like that here. Should keep you busy for a year. Or ten.

 Posted by at 00:16  Tagged with:
Oct 312012
 
RC Shopping

Here a list of where to shop stuff for RC Heli resp. Multirotors:

This list is of course not complete. This is just a personal list for me,

 Posted by at 20:30  Tagged with:
Aug 262012
 
Quad Building

I had a Turnigy Integrated Micro Quad which once broke and then it was unfixable as the broken parts continued to break again as soon as the quad touched something. No amount of glue or CF rods helped.

So I wanted to have a new one, which is about the same size (maybe a bit larger).

Here the as-complete-as-possible shopping list for my small quad (which turns out to be larger than expected):

  1. 750mm 6mm CF rods from HobbyKing
  2. Balsa wood, 3mm thick, about 200x75mm from LHS
  3. Glue (epoxy usually)
  4. 4 Motor mounts from Chris Moon
  5. 16 M3x6 screws (better: M3x8) from LHS
  6. Plenty M3 spring washer from LHS
  7. Plenty M3 plastic standoffs of various size
  8. 4 Park300 motor 1380KV from HobbyKing (incl. Prop adapter)
  9. GemFan 7035 7x3x3 from GotHeliRC (black and orange, both CW and CCW)
  10. Multicopter power distribution board from GoodLuckBuy
  11. 4 SimonK Brushless 12A ESC from AbuseMarK
  12. Naze32 from AbuseMarK
  13. 3S 2200mAh from HobbyKing

How to build the frame

Cut the 6mm CF tube into half and cut one into half again. Ideally split it into 3 pieces so that the 2 short pieces are the same length and together they are 6mm (the diameter of the tube) shorter than the long tube. What works well to cut them is a Dremel.

Cut balsa wood into squares: 75x75mm (for top and bottom) and 70x70mm. Cut the smaller ones diagonally and glue 2 identical triangles together. Check that the wood fibres are alternating left-right and forward-back like plywood does.

Put the carbon tubes in diagonally and glue them all with epoxy. What you should have now is a square piece of wood with 6 carbon tubes sticking out its diagonals. It’s right and rigid enough for a small quad.

Assembling everything

I have everything in this order from bottom to top:

  1. Below main base frame: battery straps attached with screws, and rubber foam. Simple battery holder.
  2. On main base frame in the corners: ESCs attached with zip ties (drilled holes left and right the ESCs and pulled zip ties through them)
  3. Drilled a hole along the sides of the base frame M3 screws inserted from the bottom. Fix with washer (large as balsa is soft) and spring washers, and on the top side washer, spring washer and nut.  Then some space left (as I used long M3 screws), hex nut, spring washer, power distribution board. Then nylon threaded M3 spacers.
  4. A GF plate with 45x45mm holes. I could have used anything, but I had this handy.
  5. On this GF plate I put one of those sticky things. It’s very sticky, and supposed to absorb vibrations (usually earthquake like vibrations though). I figured it’s worth a try to solve 2 problems: attach the Naze32 FC to the frame and isolate it as much as possible from motor/prob vibrations.
  6. In a corner of the CF plate I put some sticky velcro. The counterpart on the receiver.
  7. The some nylon spacers, and a GF protection ring

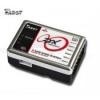
After setting up the Naze32 flight controller with the latest baseflight software (r202), everything worked out of the box. Later I changed looptime to 2000uS for for general interest than anything else.

The result is a quad which works very well in acro mode, and well in level mode. The baro works too. Mag not tested.

Needs about 70% throttle to float, which is a bit more than I expected. It also makes 2S batteries difficult or even impossible to use.

Important things to note

  • I used balsa wood because it’s soft and light. But next time plywood will be used. Or GF or CF for the bottom/top face of the main frame board.
  • I’ll make the base board larger so nothing has to stick out (like the receiver does now)
  • Need a Naze32-to-KK-size (45mm square) adapter, preferably with vibration absorption
  • My guess is that if the battery is with the FC on a board and that board is isolated from vibrations, it’ll be less vibrations for the FC. It might inadvertently lead to something like this as you cannot stack boards as I do now, so you need to work along the other axis.
  • 1 motor was clearly more out of balance than the other ones. A zip tie fixed that to a manageable level.
  • All props need balancing. 3 blades props are a bit more troublesome to balance, but look at this and for smaller props this. Until I balances them, hovering in level was not working well. It worked, but just barely.
  • I need a proper prop balancer. The one I have is of cheap quality and the rods and screws are out of balance, which makes prop balancing more dependent on those instead of the propeller.
    Update: I got a better prop balancer and it helps a lot to keep vibrations out.


 Posted by at 23:04  Tagged with:
Aug 252012
 
Walkera Devo 7 - Programming

Programming the Walkera Devo 7 transmitter is a PITA thanks to the 2 line menu and the many configuration items you can adjust. If you can find them and understand the logic of the menu structure.

This video helped a lot. And this wiki page helped a lot too. Now I can have (finally) configure the FMD switch (right upper side) to act as flight mode switch (manual, atti, failsafe). I used to use the gear switch for this, which made no sense, but it was much easier to configure initially.


 Posted by at 13:15  Tagged with:
May 052012
 
RC - Costs

Just for fun, here the list of RC stuff I have with costs (all in US$):

  1. Transmitter Walkera Devo 7 with Genius CP helicopter:  300
  2. 4 Batteries for Genius CP: 20
  3. Replacement parts for Genius CP (blades, tail unit): 30

That’s a total of 350 for a complete set. Nothing else really needed.

Now some extra parts which make this more fun (or less painful as charging batteries is not really fun at all):

  1. LiFe transmitter battery (3S, 9.9V): 10
  2. LiPo charger (LiFe, NiMH, Pb too): 25
  3. 12V PSU: zero (I have enough 12V 50W PSUs flying around from all the electronic things I have)
  4. Charger cable for heli above: 10
At this point much less worries about batteries. Any upcoming costs are now replacement parts.

Now the quadcopter:

  1. Transmitter Walkera Devo 7: 100
  2. Receiver RX802 (for above transmitter): 35
  3. Flame Wheel 330 with Naza: 450 (bought in Japan)
  4. LiPo batteries 3S 2200 mAh: a 10 = 20
  5. Cables, adapters, thread glue: 50

That’s about 650 for a complete set. Without the rather expensive Naza flight controller, it’ll be about 500 in total.

Of course there’s an endless list of useful things, but none really needed:

  1. Better propeller (Graupner, 8×5): 4 times 10 = 40
  2. GoPro camera or similar (I’ll start with the digicams we have): 200
  3. Different flight controller (15-200)
  4. Different frame: 50
  5. Motors and ESCs: 4 times (30+20) = 200
  6. Batteries: 50


 Posted by at 23:25  Tagged with:
Mar 272012
 
Quadcopter!

Built a small quadcopter. Receiver from ehirobo, transmitter from Helipal. All quadcopter parts from Hobbyking. It’s fun to build and fun to test. Firmware worked nearly out of the box. Awesome small little wind machine.

The only problem: Instead of using 2900 kV motors I got 2000 kV which results in 32% less rpm, which affects obviously the amount of lift it can produce with the same propellers. Fix: different propellers, more Volt, or more thrust. Right now I need about 85% thrust to lift. Good enough to learn I guess. But new propellers are already on my shopping list (3 blades instead of 2).

Some observations:

  1. The yaw gyro axis needs to be reversed.
  2. Set P to 50%, I to 0% and P(yaw) to 20% for starter. If you see oscillations, tune those parameters.
  3. If I is set too high, there’s a lazy motor syndrome showing: one motor will start very late. But not an issue in flight.
  4. A simple 4 channel transmitter is sufficient. More are not used anyway.
  5. The transmitter should be in “airo(plane)” mode, not “heli” mode.
  6. The cheap and simple KKmulticopter board with only 3 gyros is sufficient and it already beats any helicopter hands down in terms of stability.  At the same time, it does not take away anything else from the pilot as it’s missing all the other sensors some other quad’s have (e.g. barometer, GPS, accelerometer).
  7. There are quite a lot of versions of the software for the HK  Multi-Rotor Control Board as it’s KK board compatible. A solid one is the one from Rolf Bakke AKA kapteinkuk itself. I use version 4.7 and it seems to work fine.
  8. All those small little screws like the M2 screws for the motor mount, something non-metric and tiny for the prop saver (looks like hex sub-1mm), the 2mm diameter motor axis…I already wish for a larger quad with M3 screws as the minimum size. And it turns out that it would be only minimally more expensive, as small motors are like shoes for children: small does not mean cheap.

BTW, I used yaw by hanging the quad on a long rubber band. Since yaw relatively weak, it did not work well in my hand. I could feel it reacted on me turning it left or right, but I could not really say whether it’s amplifying or counteracting yaw. Turned out it’s amplifying it, and it was very obvious once I lifted the quad into the air on those rubber bands.

 Posted by at 09:34  Tagged with: